When looking at a house to buy there may be several things that can be learned while in the comfort of your own home.
I use the web to start the inspection process when the appointment is booked. I can usually determine the age of the house which will tell me things like where the mechanical systems will be (water heater, furnace, electrical panel(s)), where the attic and crawlspace accesses are located. Here is my process:
- First, I just do a general search on the address. This will bring up the real-estate-based pages like Zillow, Redfin, Realtor.com, Trulia, and any real estate companies that have had the property as a listing. Most of these sites have the same information because they all grab the same info from the local listing service, but it doesn’t hurt to check them all out. There may be old photos from a previous listing that can give you some history of repairs/remodeling and sometimes agents will enter more information about the house on their own site than they enter on the MLS site. This can be not-so-valuable when a listing agent does not do a good job of entering information, but if the listing agent does a thorough job of entering the info about the house there is quite a bit of info to be gathered.
- Year built: This is an important step because building styles and materials have followed patterns and almost everyone was building similar very houses with similar materials at any given time. Of course, there are special houses but if you are looking at the majority of what was built in a year range most houses will have similar features. Such as: LP siding in the mid ‘80’s’80s to early ‘90’s’90s in the PNW. Crawlspace accesses were outside before the 1970s. ‘90’s’90s or newer two-story houses- crawlspace access will be under the stairs on the first floor and the attic access will be in the master bedroom closet. Electrical panels from the 1970s until now are mostly in the garage. The list goes on, but you get the idea. Here is a presentation on Age-Based Inspections.
- Pictures: From my limited research of real estate in other areas I have found that, in this part of the world (west side of Oregon), real estate agents do a very good job at listing photos. With a bunch of wide-angle and close-up shots you can learn a lot about a house. (Just keep in mind: wide angle lenses can make spaces look WAY bigger than they actually are. Sometimes the listing photos can be a bit misleading)
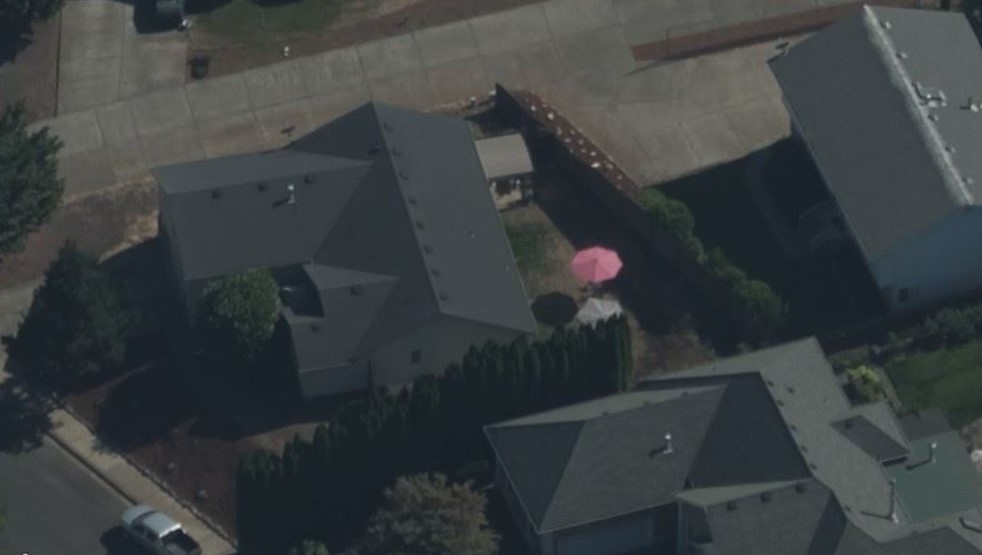
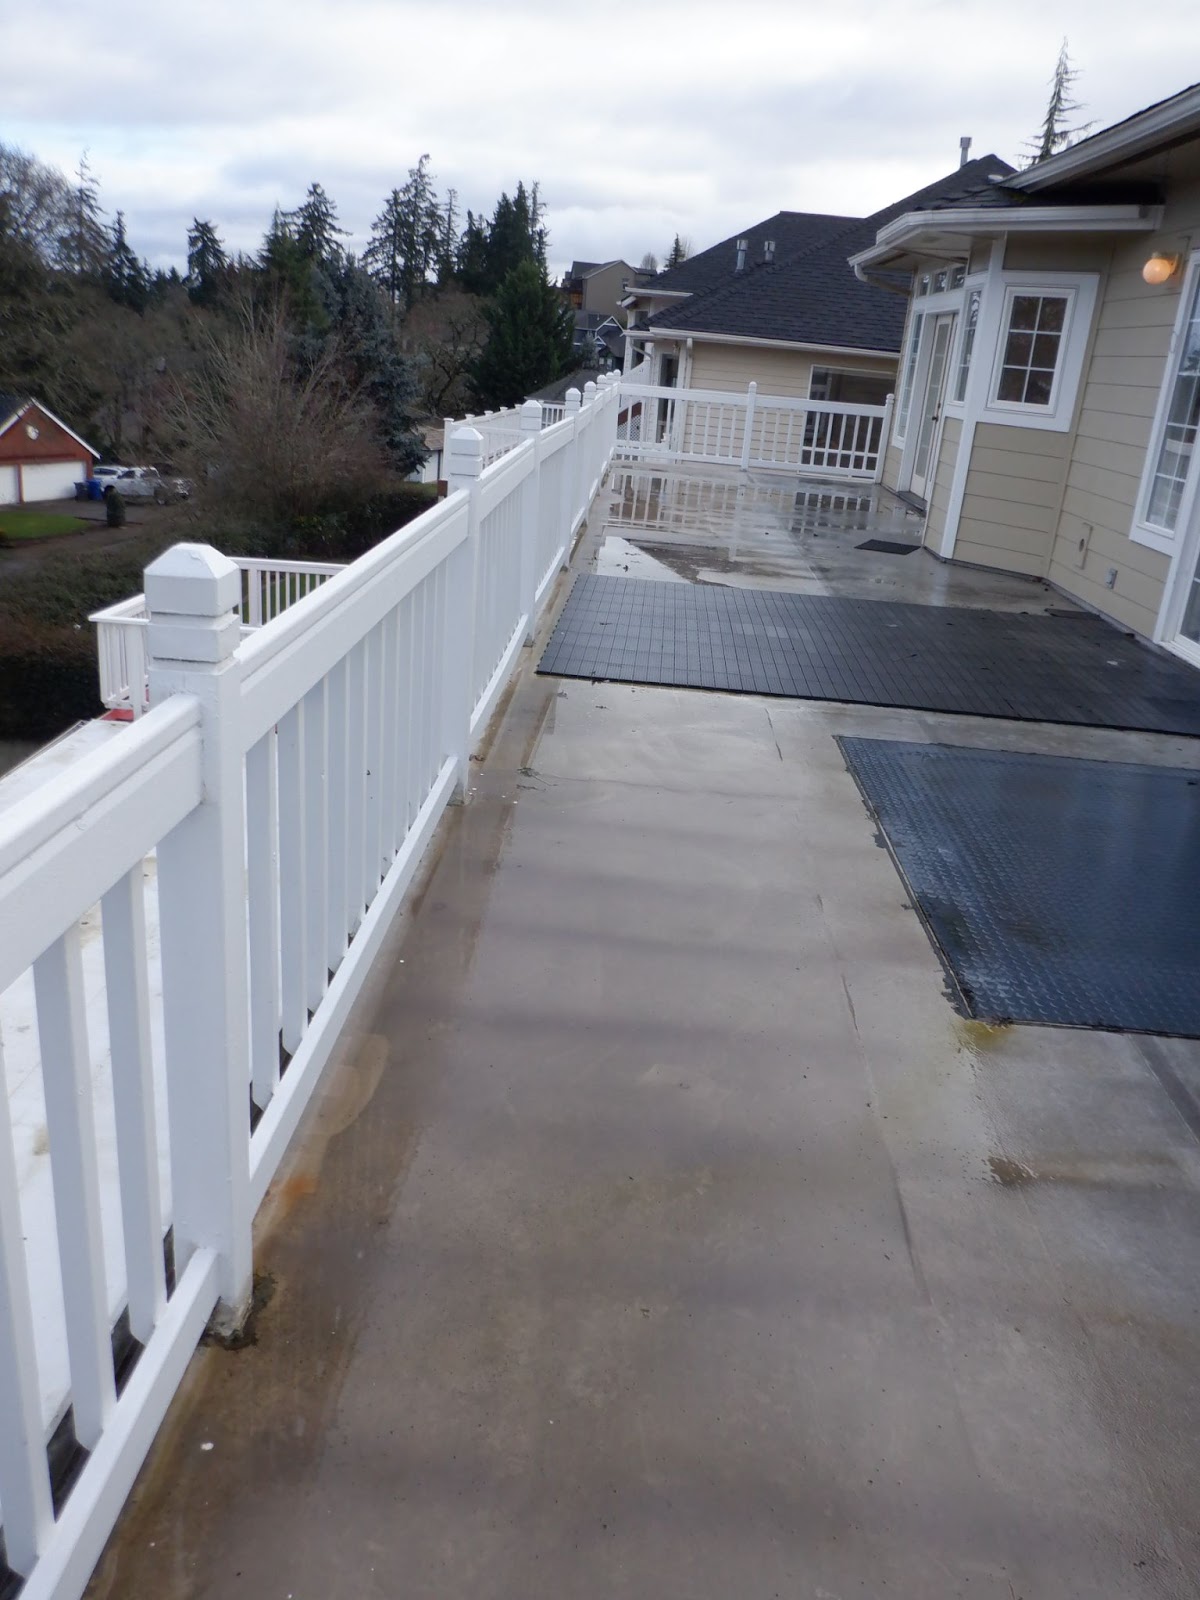
- The area around the house: How does the driveway look? Does it slope toward the garage? What about plants and large trees? Although plants can be nice, they can also cause damage if they are touching, especially large trees touching the roof. What does the yard look like? Will you need to be anticipating deck or fence repair? (The answer is YES, if it has a wooden deck and/or fence) How about the roof and entire lot? Aerial pictures?

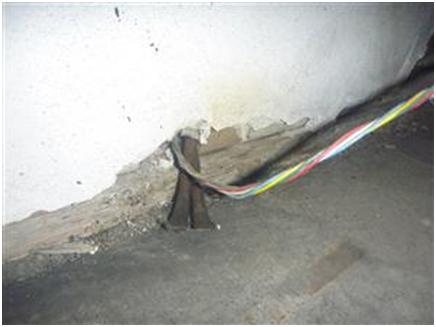
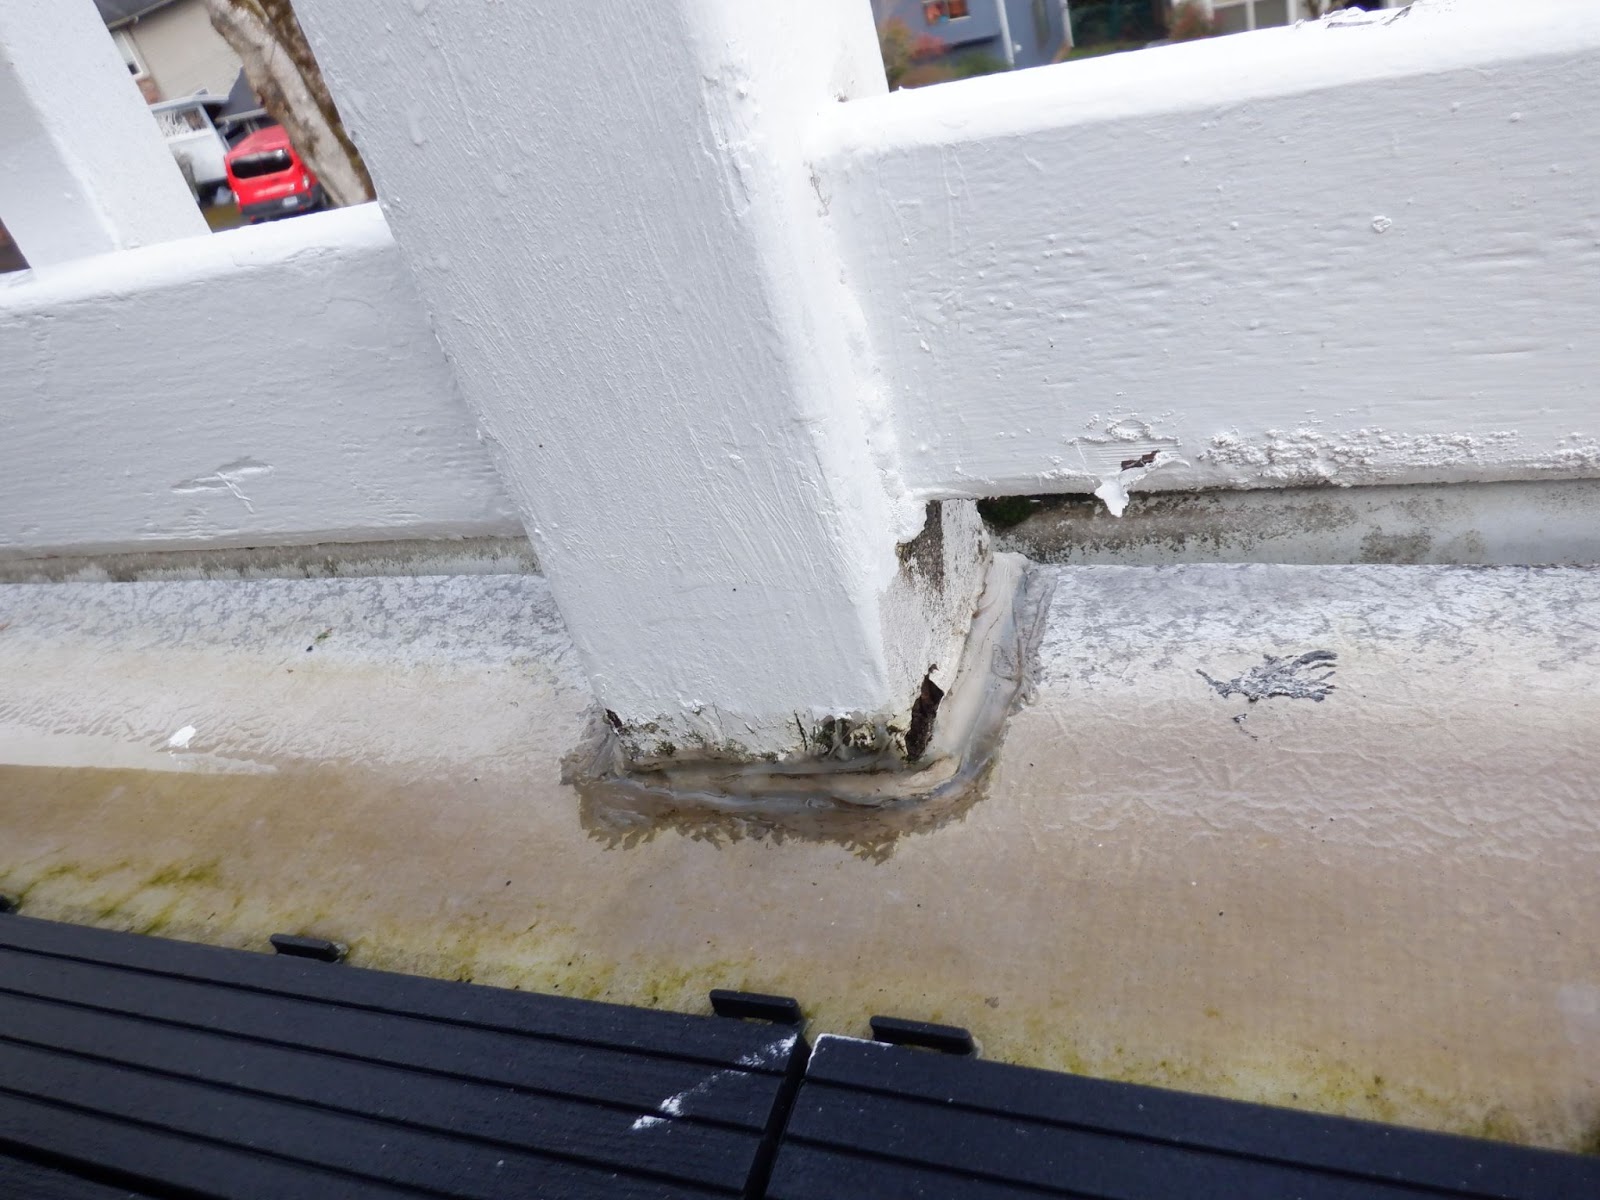
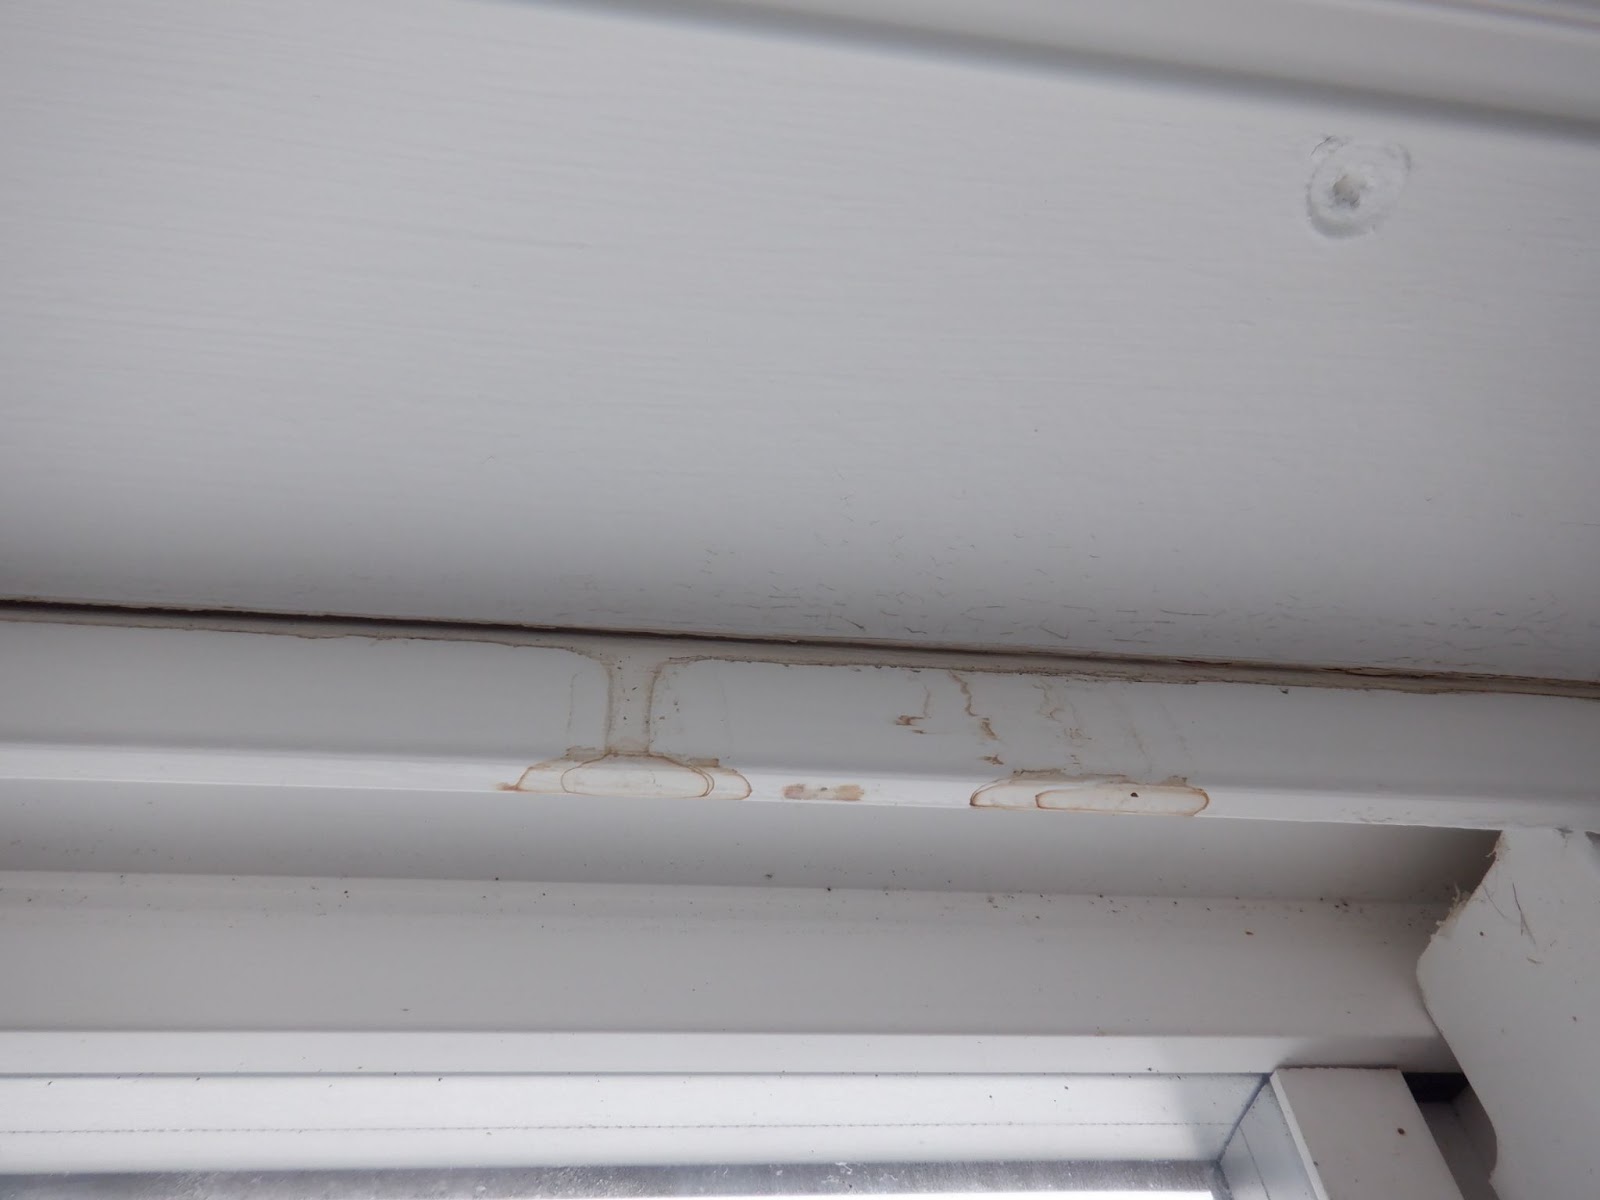
Here you can see the “meeting rails” where this triple-wide manufactured house came together. Although it was not called a manufactured house in the listing, we can now be certain of the fact that it is a manufactured house and will be looking for other things like: how are the deck and garage attached to the building (hopefully they are not!) (update after the inspection: the garage was attached to the building and will require some serious rebuilding to repair the engineering!) and polybutylene plumbing if it was built in the ‘90’s’90s which it was. (update: it had PB plumbing!).
- Inside pictures: Is there wear and tear on the walls, doors, floors, cabinets, counters? Carpet in bathrooms? Skylights? These pictures are not usually very helpful because no one wants to take a picture of an issue or a worn out system but sometimes some things can be spotted if you look close enough.
- General maintenance info:
- Does the house have a septic or sewer system? These components should always be camera inspected. Just get mentally prepared for this, we haven’t bought this house yet, we are still researching.
- City water or well? Again, this is just a get-ready thing. If it has a well there will be pumps, tanks, piping and wiring that will be your responsibility. If it has city water there is not too much to worry about with that system.
- Property tax estimate? It might be good to know what those taxes will be!
- Homeowners’ association? If there is an association, you should get some minutes from meetings or a copy of the by-laws. Some associations can be over the top. I have heard of association reps measuring grass length with rulers to ensure compliance! These will be all things that can be important issues that should be further researched.
- Next, check out mapping services. Google maps and Bing
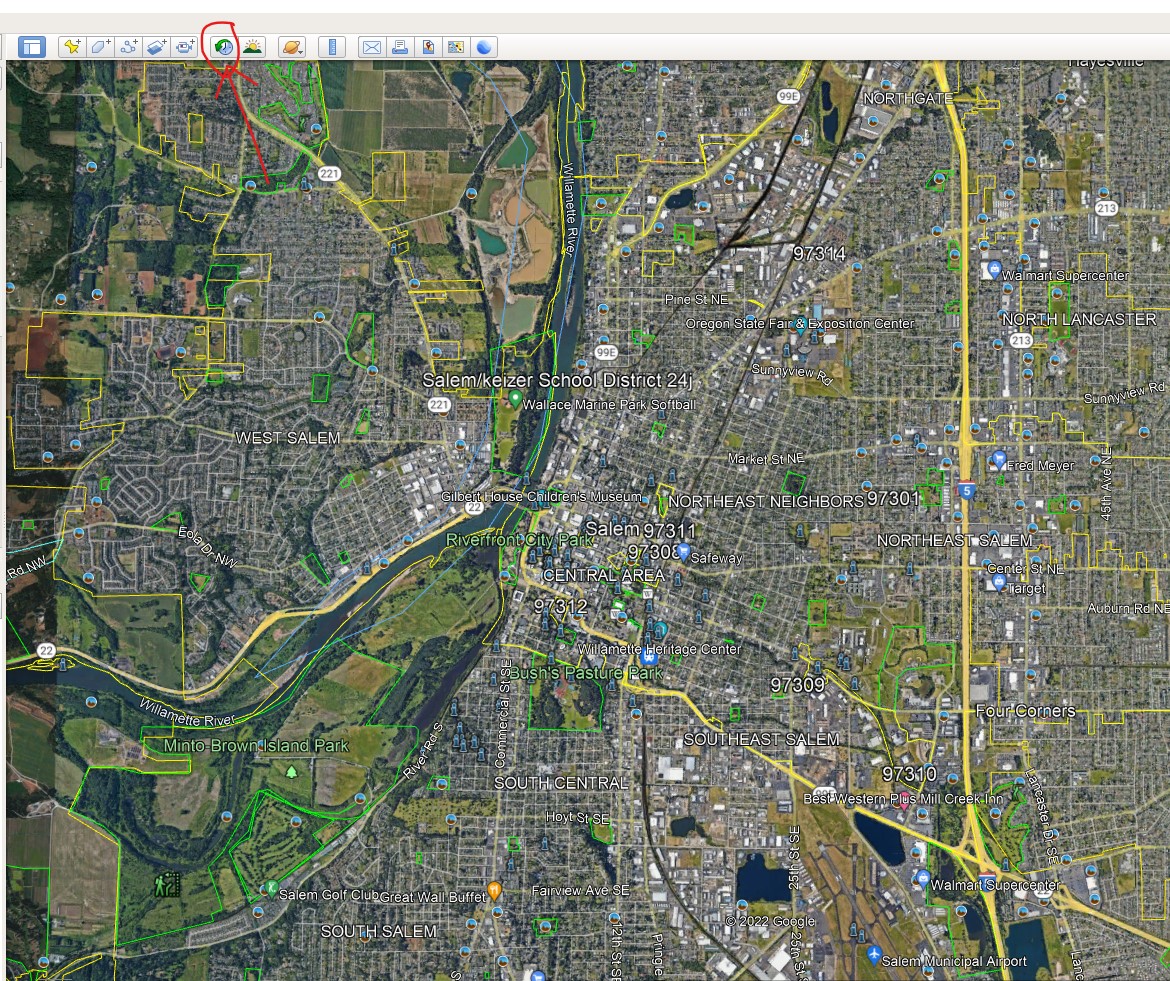
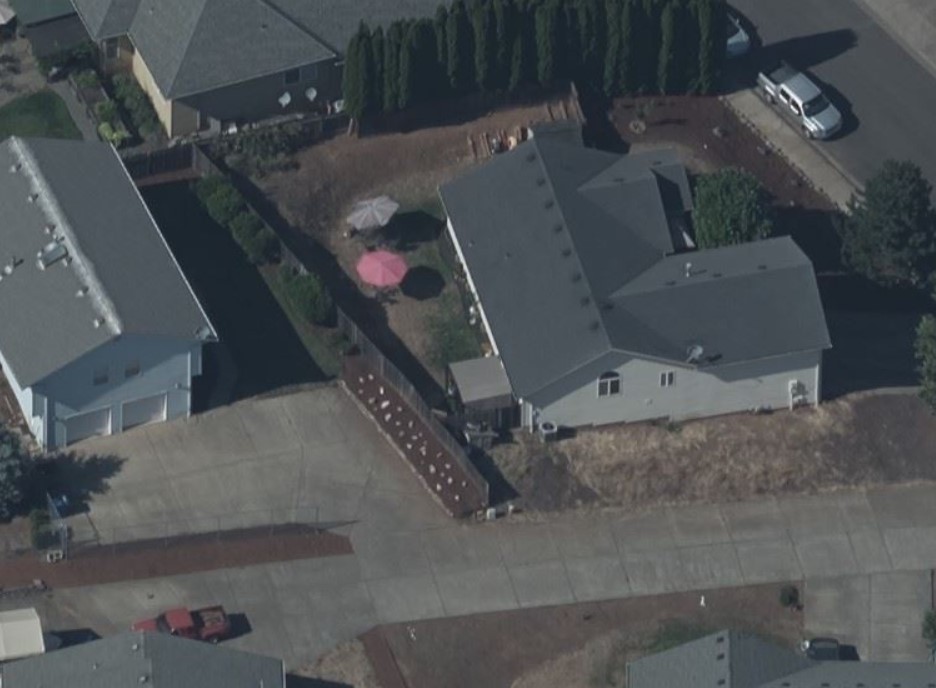
- Satellite photos can give an idea of how close the house sits to the neighbors, or highway, or shared driveways. Do the neighbors have a huge garbage pile or a junkyard behind their house? (This can lead to rodent issues for everyone!) Also, how close is the house to the nearby parks, schools, and stores? Looking at a map can quickly help you see that a cool little park is only 2 blocks away if you cut between two neighborhoods, for instance. Google satellite photos get “enhanced” as you zoom in and can get weird looking. Google Earth is the best I have found for high-definition satellite photos. It is a separate program that you download to your computer and there are a bunch of cool features with this program such as a “birds eye” view (which gives you an angle that can view the property instead of from the very top) and a timeline feature that you can scroll back in time and view old satellite photos back into the 1980s’ and 90s’ (although the older satellite pics are pretty grainy and low definition).
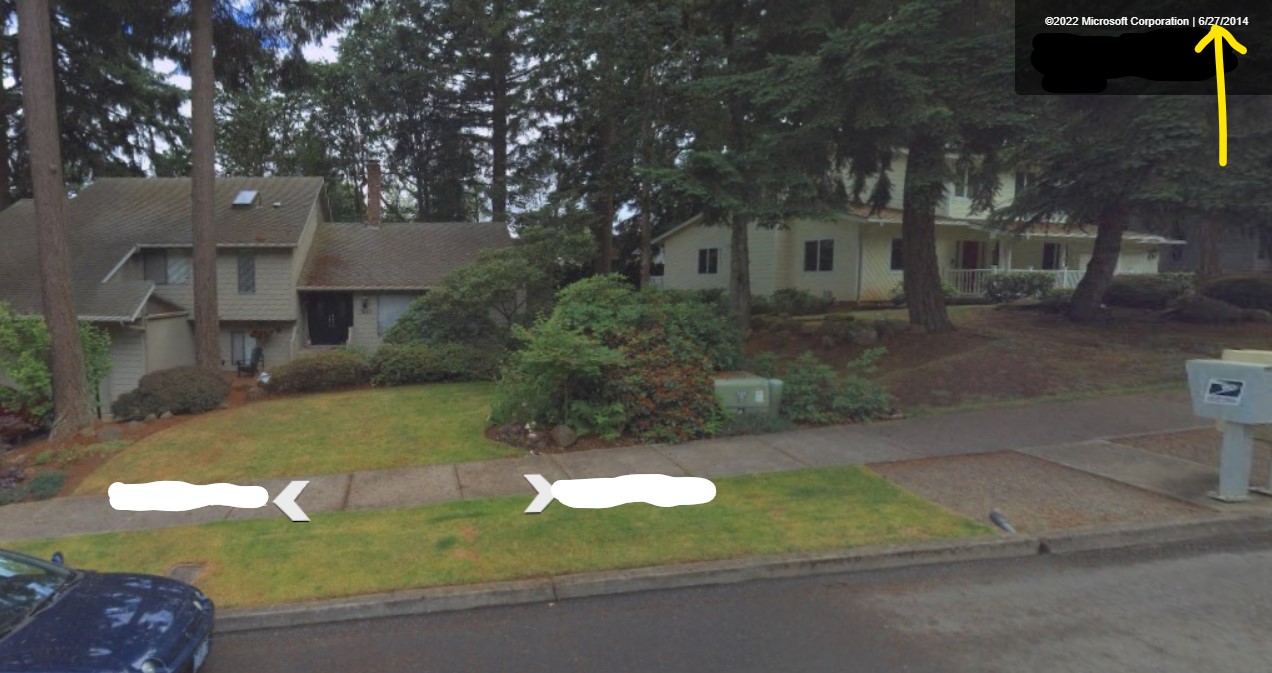
- Street view can be pretty cool for a view of the house that no one expects. You can zoom around the neighborhood, 360° picture-by-picture. You can see the front of the house and sometimes different angles on the house. Also along the bottom of the screen is the date that the image was captured. Some areas that have had multiple years of the 360° Google cars will have a date scroll in the top left corner: This allows you to choose older dates to see what the house/neighborhood looked like 10 years ago or in the spring vs. fall. Bing has its street view too, so that can give you another look at the house/neighborhood at a particular point in time. In the upper right of the Bing Street view, you can see the date the picture was taken.
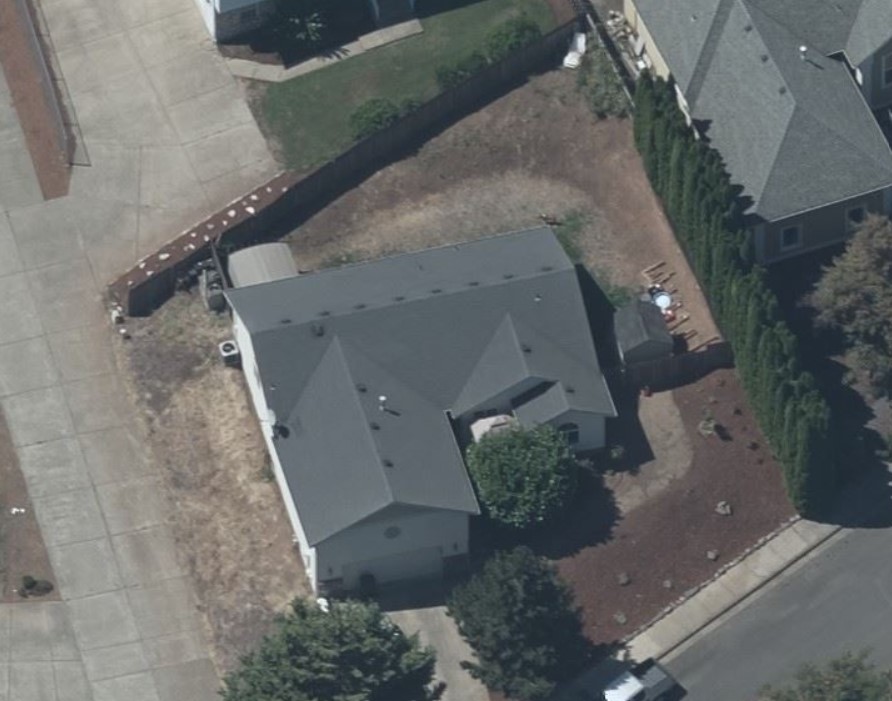
- Bing also has a “birds eye view” setting. While not very helpful for heavily treed lots, you can rotate the cardinal dial to view the house from the north, east, south and west.
- Satellite photos can give an idea of how close the house sits to the neighbors, or highway, or shared driveways. Do the neighbors have a huge garbage pile or a junkyard behind their house? (This can lead to rodent issues for everyone!) Also, how close is the house to the nearby parks, schools, and stores? Looking at a map can quickly help you see that a cool little park is only 2 blocks away if you cut between two neighborhoods, for instance. Google satellite photos get “enhanced” as you zoom in and can get weird looking. Google Earth is the best I have found for high-definition satellite photos. It is a separate program that you download to your computer and there are a bunch of cool features with this program such as a “birds eye” view (which gives you an angle that can view the property instead of from the very top) and a timeline feature that you can scroll back in time and view old satellite photos back into the 1980s’ and 90s’ (although the older satellite pics are pretty grainy and low definition).

- The G-terrain feature is not very helpful. It is a pretty basic and hard to read topo map with some shading to indicate slopes and flats.
- The last place I might dig would be the local building official website. It is not terribly reliable due to paper forms being/not being converted to soft copies and currently (12/2022) the site states that they only have records from 2005 (although I have seen permits back into the 1960’s on this site). Also, you must jump through some hoops and get yourself registered. But once all of that is done you can insert an address and see what has happened (or at least been permitted) in the last 15 years. https://permits.cityofsalem.net/

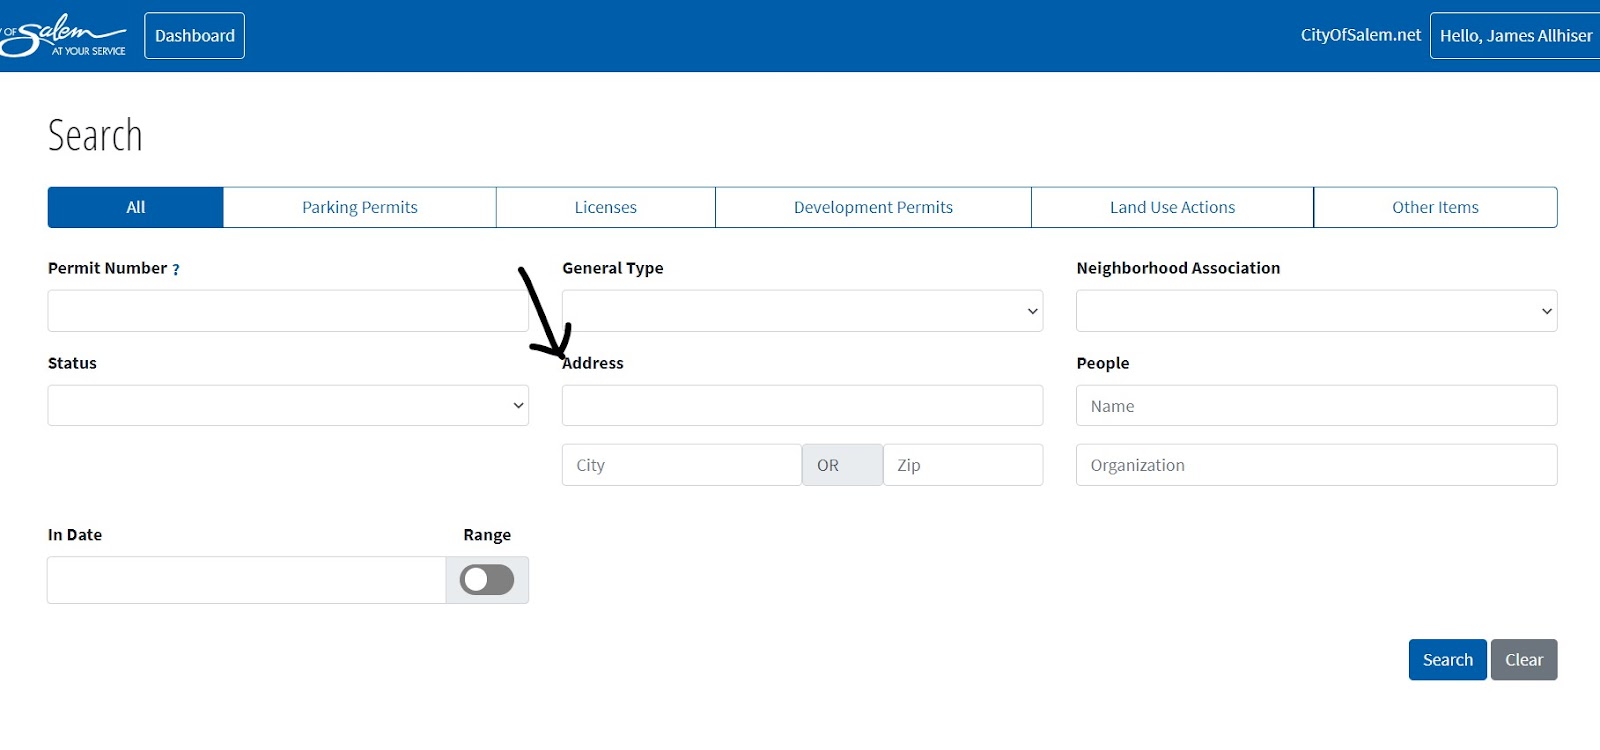
So I just picked a house I am about to inspect and pulled up 6 separate permits, dating back to 1999.
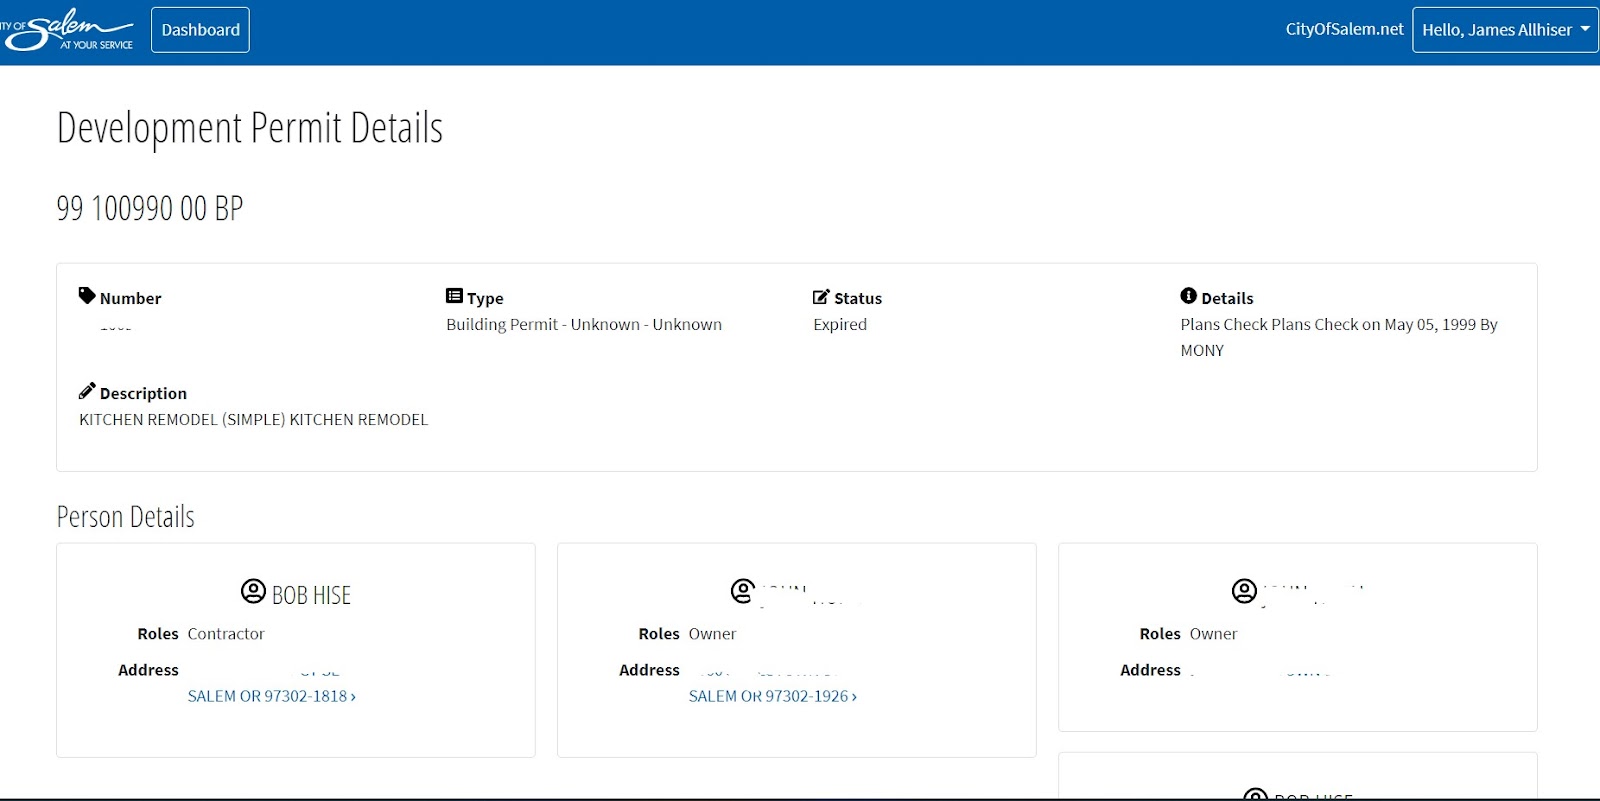
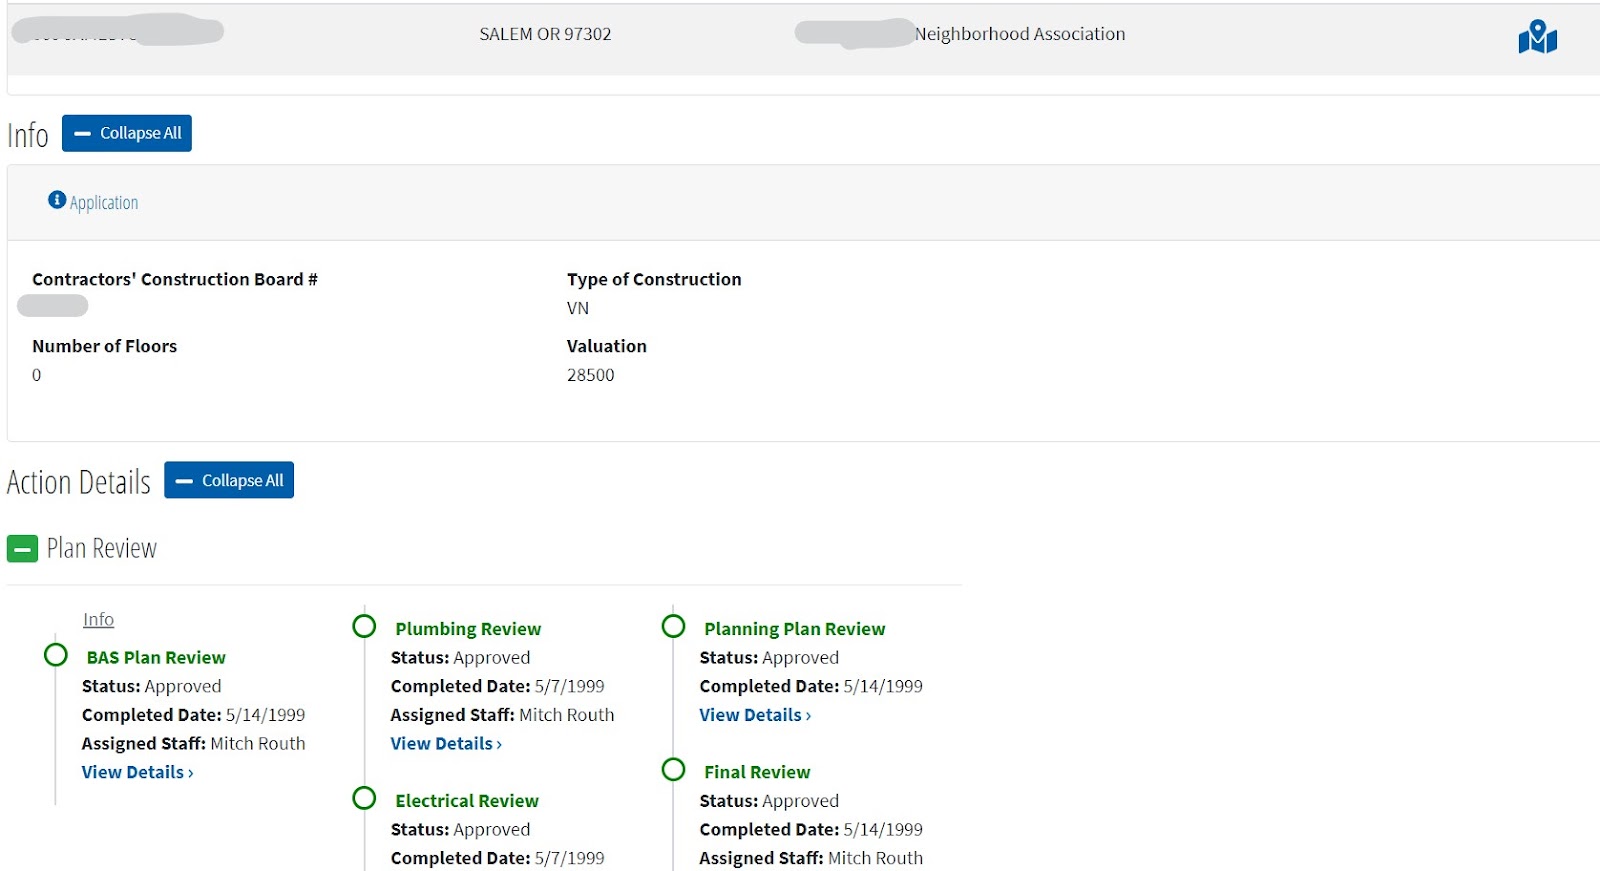
In 1999 it had a kitchen remodel: Bob Hise was the contractor, and I can open each of the reviews for a little more information.
That is about it. With the information superhighway at all of our fingertips, you too can start inspecting your potential property before you even leave the house! Let me know if there are other handy resources that I didn’t mention. As always if you have any questions, please drop me a call or email:
Jim Allhiser

503.508.4321


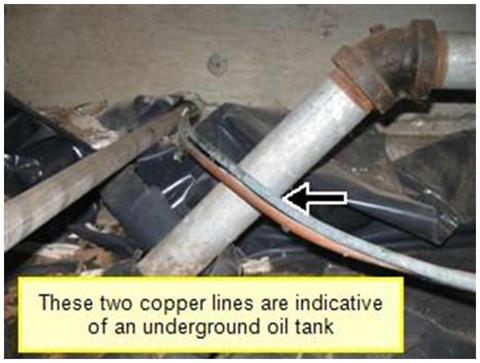
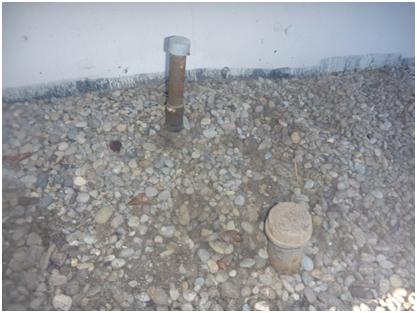 These tubes are